EWI has recently acquired a Correlated Solutions 3D digital image correlation (DIC) system. The system was purchased for use in the EWI Forming Center for evaluation of deformation in sheet metals to produce forming limit diagrams. When the system is not being utilized by the forming center, it is available for use in other capacities.
DIC is a non-contact optical geometry and deformation measurement tool which utilizes a speckle pattern painted on the subject material surface to measure strain and changes in geometry during testing. Examples of measurements that have been made at EWI with the system include:
- Tensile testing – two instances of tensile testing where the DIC system was used to understand and visualize what was occurring during the test. The first case was a cross weld tensile test which contained a weld that that had lower yield strength but higher strain hardening capacity than that of the base material. The use of the DIC system to evaluate a set of tensile tests on this material showed that the plastic deformation at the beginning of the test was concentrated in the weld material and shifted to the base material once the strength of the weld was balanced with the base material. Click here to view a video of the Cross Weld Tensile Test of Yield Undermatched Weld.
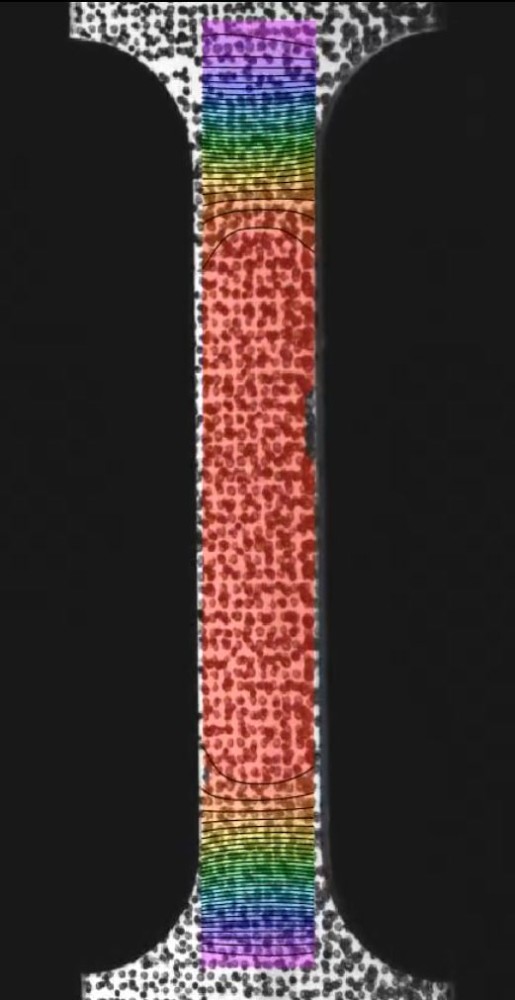
- The second case was a study of the behavior of 5xxx series aluminum which showed stepped behavior in a transverse extensometer measurement. Initial assumptions were that the sample was slipping in the grips of the tensile machine. However, after subsequent tests which prevented slipping, the DIC system was employed to evaluate the defamation in a sample. Evaluation of the images of the tensile test overlaid with a color pattern representing strain showed that the material deformed in waves that ran back and forth along the reduced section of the tensile sample throughout the plastic deformation of the sample. To view the Comparison of 5 and 6xxx Series Tensile Test Using DIC video, click here.
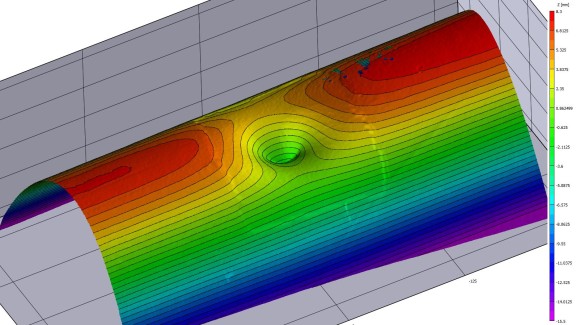
- Pipe dent measurements – although the DIC system is normally associated with active deformation, it has the capability to measure the geometry of a surface. In this case the dented surface of a pipe was of interest before and after a pressure test. The exterior surface of the pipe was prepared with a speckle pattern and the system was calibrated. Several photos of the pipe provided a point map of the dented surface that was measured before and after the test. The comparison of the pretest and post test measurements allowed accurate evaluation of the change in dent geometry with minimal effort.
3 Dimensional measurement of dent in pipe (square area around dent is extent of coating removal)
Surface preparation for DIC evaluation consists paining the surface flat white and paining a black speckle pattern over the flat white background. The system can also be used to evaluate samples that are at elevated temperature as long as the paint used on the sample can withstand the temperature. The DIC system is available at EWI’s Columbus location or can be transported to a customer location.
For more information about EWI’s DIC system contact [email protected].


